

To instantly look more professional with a two-light setup, position your key light at about 45° angle and slightly above eye level for natural shadows and a healthy glow. Use a softer fill light on the opposite side to fill shadows subtly, balancing brightness and color temperature for a polished look. Keep your lights at appropriate distances to avoid harshness or flatness. Continue exploring tips and adjustments to achieve perfect, professional-quality images.
Key Takeaways
- Position the key light at a 45° angle and slightly above eye level for natural, flattering facial illumination.
- Use a fill light opposite the key light at a lower intensity to soften shadows and add depth.
- Maintain a consistent warm color temperature around 3500K for a healthy, professional skin tone.
- Diffuse or bounce lights to soften harsh shadows and create a smooth, polished look.
- Adjust light angles and distances to avoid flatness or harsh shadows, ensuring a balanced, natural appearance.
Top picks for "light setup look"
Open Amazon search results for this keyword.
As an affiliate, we earn on qualifying purchases.
Understanding the Basics of Two-Light Photography

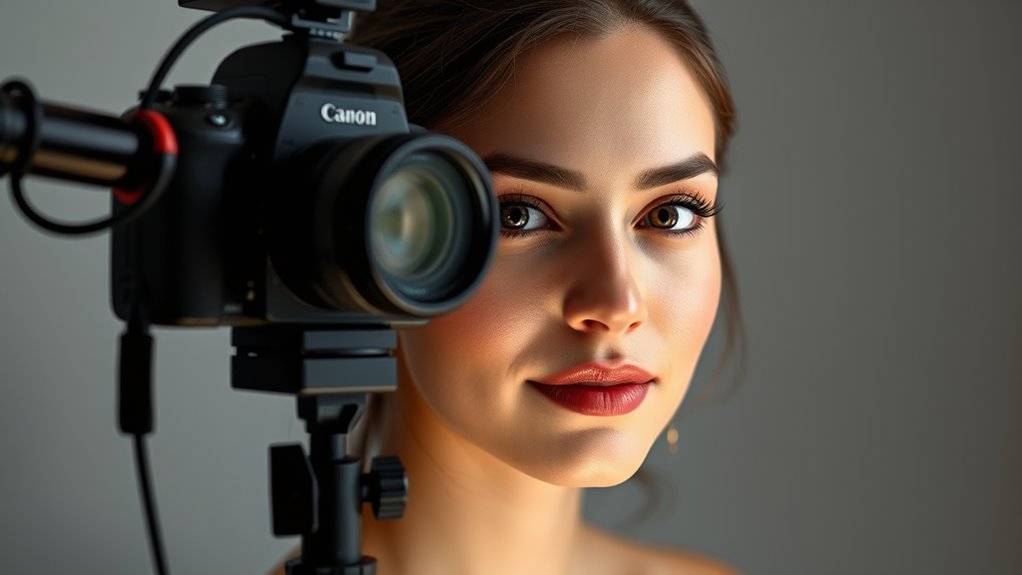
Understanding the basics of two-light photography is essential for creating professional-looking images. You’ll use two light sources to control the subject’s appearance and mood effectively. Typically, one light acts as the key light, providing the main illumination and shaping the subject’s features. The other serves as the fill light, softening shadows and balancing the overall exposure. Positioning these lights correctly is vital; the key light is usually placed at a 45-degree angle to the subject, while the fill light is set on the opposite side, often at a lower intensity. This setup enhances depth and dimension, giving your photos a polished, professional look. Mastering how these lights interact helps you craft compelling images that stand out.
Selecting the Right Key Light for Your Setup

Choosing the right key light means considering its color temperature and how it impacts your look, along with adjusting brightness to create the desired mood. You also need to think about the size and shape of the light to control shadows and coverage effectively. By understanding these factors, you’ll guarantee your setup looks professional and flattering.
Light Temperature and Color
Selecting the right key light involves paying close attention to its color temperature, which affects how natural or professional your appearance looks on camera. A warmer light, around 3,000 to 4,000 Kelvin, creates a cozy, inviting feel, ideal for relaxed settings. Cooler lights, around 5,500 to 6,500 Kelvin, resemble daylight and give a crisp, professional look suitable for corporate or serious content. Consistency is key, so choose a light that matches your environment’s overall tone. Some lights allow you to adjust the color temperature, giving you flexibility. Avoid mixing different color temperatures, as this can create unflattering color casts. By selecting a light that aligns with your desired aesthetic, you’ll ensure your on-camera appearance is polished and professional.
Brightness and Intensity Control
Adjusting the brightness and intensity of your key light is essential to achieving a balanced, professional look on camera. Too bright, and you risk washing out your features; too dim, and you appear dull or shadowed. Start by setting your light to a moderate level, then adjust gradually while watching your reflection or a preview monitor. Aim for soft, even illumination that highlights your face without creating harsh shadows. Use dimmers or brightness controls on your light to fine-tune the output. Remember, your goal is natural, flattering light that complements your skin tone and enhances your appearance. Consistently checking your shot helps you maintain the right balance, ensuring you look polished and professional in every frame.
Size and Shape Considerations
The size and shape of your key light considerably impact how your features are rendered on camera. A larger light produces softer, more even illumination, reducing shadows and highlighting detail smoothly. This is ideal if you want a flattering, professional look. Conversely, a smaller light creates sharper shadows and more contrast, adding drama or emphasis to certain features. Shape also matters: a round, soft-edged light offers gentle, natural glow, while a rectangular or focused light can create more defined shadows, adding depth. Consider your environment and the mood you want to convey. If you’re aiming for a polished, approachable appearance, opt for a larger, soft light. For a more striking or creative effect, a smaller, more focused light works better.
Positioning Your Fill Light for a Flattering Look
To achieve a flattering look with your fill light, position it slightly above and to the side of your face, aiming downward at about a 45-degree angle. This placement helps soften shadows and reduces harsh lines, creating a more natural and appealing appearance. Keep the light close enough to fill in shadows without overpowering your key light, maintaining a balanced look. Avoid placing the fill light directly in front or below your face, as this can flatten features or create unflattering shadows. Instead, adjust the angle so it complements your face shape, enhancing your features subtly. The goal is to add gentle illumination that smooths skin tones and reduces contrast, making you look polished and professional on camera.
Adjusting Light Intensity and Balance
Achieving a professional look requires balancing your fill light’s intensity to complement your key light without overpowering it. Start by dimming or brightening your fill light until it gently softens shadows, ensuring your face is evenly lit. The goal isn’t to match the key light exactly but to create a harmonious balance that adds dimension without washing out your features. Use your camera’s preview or a mirror to judge how the lighting appears on your face. Adjust the brightness incrementally, checking for harsh shadows or overly flat lighting. Remember, a subtle difference can make a big impact. Aim for a natural, well-defined look that enhances your features while maintaining a professional, polished appearance.
Choosing the Best Equipment for a Budget-Friendly Setup

Creating a professional lighting setup doesn’t have to break the bank; smart choices can deliver great results on a budget. Start with affordable LED panel lights or ring lights, which provide soft, even illumination. Look for models with adjustable brightness and color temperature to match your environment. You don’t need fancy brands—many budget-friendly options deliver excellent quality. Use basic light stands or even DIY solutions like stable surfaces to hold your lights. Pair these with inexpensive diffusion materials, like white bedsheets or shower curtains, to soften the light. Invest in a reliable, inexpensive tripod or mount for stability. Remember, the goal is to achieve balanced, flattering light without overspending. Thoughtful choices and creative solutions can make your setup look professional without draining your wallet.
Tips for Achieving a Natural and Professional Appearance
To look natural and professional on camera, focus on softening shadows to create even lighting that flatters your features. Adding a touch of gentle warmth can make your skin tone appear more inviting and lively. These simple adjustments help you achieve a polished, authentic appearance effortlessly.
Softens Shadows Effectively
Softening shadows is essential for a natural, professional look, especially when using the two-light setup. To achieve this, position your fill light close enough to your main light, but at a lower intensity. This reduces harsh shadows and creates a more even, flattering illumination. Adjust the angle so that shadows fall softly and gently, avoiding sharp lines that can appear unflattering. Using a diffuser or bouncing light off a white surface also helps spread light evenly, minimizing contrast. Remember, your goal is to create subtle gradations between light and shadow, evoking warmth and approachability. Here’s a visual to guide you:
| Light Intensity | Shadow Softness | Mood Created |
|---|---|---|
| Low | Sharp | Stark, Unfriendly |
| Moderate | Slightly soft | Professional |
| High | Very soft | Warm, Approachable |
Adds Gentle Warmth
Adding a touch of warmth to your lighting can substantially enhance your professional appearance, making your face look more inviting and natural. Warm light creates a friendly, approachable vibe, which helps viewers feel more comfortable during video calls or recordings. To achieve this, choose a light with a warmer color temperature, around 3000K to 3500K, instead of harsh, cool-toned bulbs. You can also add a subtle warming filter or gel to your light source. Position the light slightly above eye level and angled toward your face to create a gentle glow. Avoid overly yellow or orange hues, as they can look unnatural. The goal is to mimic natural sunlight or a cozy indoor glow, giving your face a healthy, professional radiance.
Common Mistakes to Avoid With Two-Light Lighting
One common mistake with two-light setups is placing the lights too close together or at incorrect angles, which can cause harsh shadows or an unbalanced look. To avoid this, position your lights thoughtfully. Keep in mind the following:
| Mistake | Effect | Solution |
|---|---|---|
| Lights too close | Blurry, flat look | Increase distance for softer light |
| Lights at same height | Flat, unflattering shadow | Place lights at different angles |
| Directly facing subject | Harsh shadows, glare | Soften with diffusers or bounce |
| Ignoring background light | Inconsistent tone | Add background light or adjust key |
Frequently Asked Questions
Can I Use Natural Light Instead of Artificial Lights?
Yes, you can use natural light instead of artificial lights. Find a well-lit window and position yourself so that the light hits your face evenly, avoiding harsh shadows. Shoot during the day when sunlight is soft, like morning or late afternoon. Use curtains or blinds to diffuse bright sunlight if needed. Natural light creates a warm, authentic look, but be mindful of changing weather conditions and avoid direct sunlight that causes glare.
How Do I Modify the Setup for Small Spaces?
To modify the setup for small spaces, position your key light close to your face but avoid cluttering the background. Use a compact, adjustable light or a small ring light to save space. Place the fill light at a lower angle or use a reflector to bounce light gently. Keep everything minimal and guarantee your lighting is soft to avoid harsh shadows, making your setup look professional even in tight areas.
What Color Temperature Should My Lights Be?
You should aim for lights around 5600K, mimicking natural daylight and giving you that crisp, professional glow. Anything cooler might make you look like you’re stuck in a fluorescent nightmare, while warmer tones could turn you into a golden-hued mystery. Stick to daylight temps for clarity and neutrality, ensuring your face looks vibrant without turning into a glowing orb or a shadowy figure. Your audience will thank you.
Is a Two-Light Setup Suitable for Outdoor Shooting?
A two-light setup can work outdoors, but it depends on your environment. You should use one light as your main source and the other for fill or background, adjusting for natural light conditions. Keep in mind that outdoor lighting can be unpredictable, so you might need to modify your setup or add modifiers like diffusers or reflectors. This approach helps you control shadows and achieve a professional look in variable outdoor settings.
How Do I Adapt This Setup for Video Conferencing?
You can adapt the two-light setup for video conferencing by positioning a key light just above your camera, illuminating your face evenly, and using a softer fill light to diminish shadows. For example, during a virtual presentation, this setup ensures you look polished and professional. Adjust the lights to avoid glare on your glasses and ensure your background remains well-lit, creating a confident, approachable appearance on camera.
Conclusion
Mastering the two-light setup instantly boosts your professional look, making your photos more polished and confident. Did you know that proper lighting can improve viewer perception by up to 80%? By understanding the basics and carefully adjusting your lights, you’ll create flattering, natural results without breaking the bank. Keep practicing, avoid common mistakes, and you’ll see your photos elevate to a whole new level—making you look more credible and polished every time.