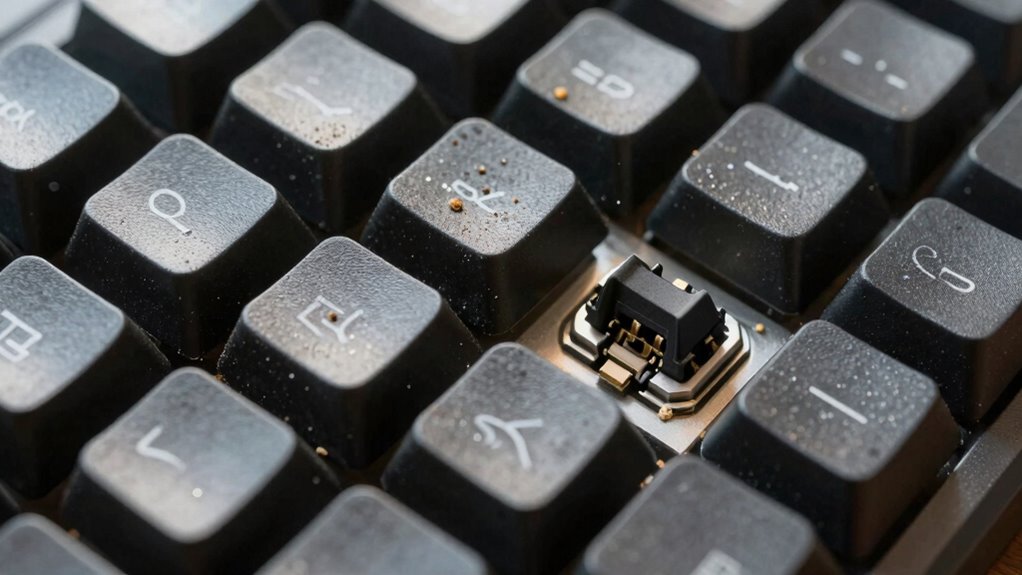

To prevent dust from turning into sticky goo, start by unplugging and turning off your keyboard. Use compressed air to blow out debris and dust from between the keys, and wipe the surface with a damp microfiber cloth. For stubborn dirt, gently clean between keys with a soft brush or toothpick, and disinfect safely with isopropyl alcohol. Regular maintenance helps keep your keyboard clean and functional—stick around to learn the best techniques to keep dust at bay.
Key Takeaways
- Use compressed air in short bursts to remove dust without spreading debris or causing damage.
- Avoid using excessive liquids or spraying disinfectants directly on the keyboard to prevent sticky buildup.
- Gently clean between keys with a soft brush or toothpick to dislodge debris safely.
- Wipe surfaces with a damp microfiber cloth using minimal isopropyl alcohol for effective disinfecting.
- Regularly maintain your keyboard with routine dusting and cleaning habits to prevent dust from turning into goo.

Juxiamal 5 PCS Mini Keyboard Cleaning Brushes Kit, PP Handle Nylon Anti Static Electronic Dust Cleaning Brush for Computer Keyboard Motherboard Camera Small Space
This set of keyboard cleaning brushes is well made, comes in a variety of shapes and sizes for…
As an affiliate, we earn on qualifying purchases.
As an affiliate, we earn on qualifying purchases.
Gather Your Cleaning Supplies
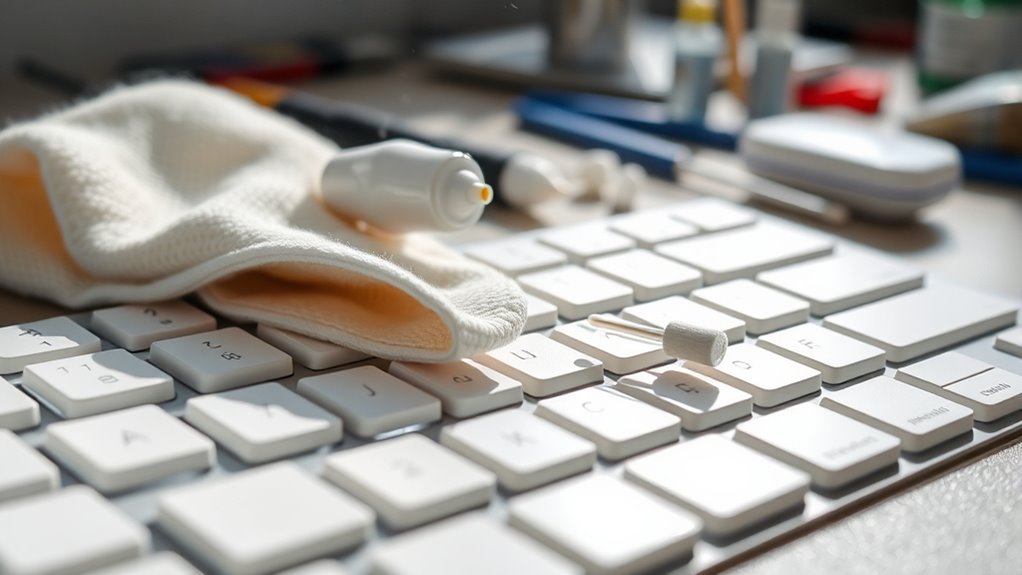
To effectively clean your keyboard, start by gathering all the necessary supplies. You’ll need a soft microfiber cloth to wipe surfaces without scratching. Have some cotton swabs ready to reach tight spaces between keys. A small brush, like a clean paintbrush or a specialized keyboard brush, helps remove dust and debris. Keep a can of compressed air nearby to blow out crumbs and dirt lodged under keys. You’ll also want some isopropyl alcohol (at least 70%) for disinfecting surfaces and a gentle cleaning solution or mild soap for stubborn spots. Don’t forget to have a clean, dry towel or paper towels on hand for drying. Collecting these supplies beforehand guarantees you’re prepared to thoroughly clean your keyboard without interruptions.
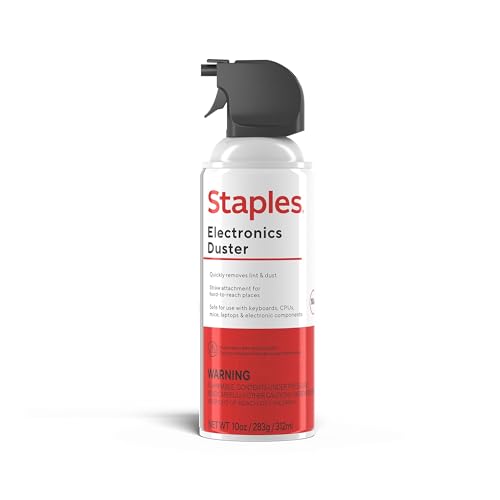
Staples Compressed Air Duster – 10 oz. Can for Electronics, Keyboards & Office Devices
POWERFUL DUST REMOVAL FOR ELECTRONICS – Removes dust, dirt, and debris from keyboards, computers, laptops, printers, gaming consoles,…
As an affiliate, we earn on qualifying purchases.
As an affiliate, we earn on qualifying purchases.
Power Down and Unplug Your Keyboard

Before you start cleaning, make sure to power down and unplug your keyboard. This prevents accidental key presses and electric shocks, protecting both you and your device. Always disconnect your keyboard from the computer to avoid static damage or short circuits. If you’re using a wireless keyboard, turn it off before cleaning. Consider the following before proceeding:
- Remove batteries if applicable
- Avoid cleaning liquids near open ports
- Wear an anti-static wrist strap if needed
- Place the keyboard on a stable, clean surface
- Keep small parts or debris away from power sources
Taking these steps guarantees safety and preserves your keyboard’s functionality. Powering down and unplugging is the safest way to prevent damage during cleaning. It’s a simple but vital step to maintain your device’s longevity.

Amazon Basics 70% Isopropyl Alcohol First Aid Antiseptic for Treatment of Minor Cuts, Scrapes and Burns, Unscented, 32 Fl Oz (Pack of 1) (Previously Solimo)
One 32 fluid ounce bottle of first aid antiseptic
As an affiliate, we earn on qualifying purchases.
As an affiliate, we earn on qualifying purchases.
Remove Loose Debris and Dust
To remove loose debris and dust, you should start with compressed air to blow particles out from between the keys. Use gentle brushing techniques to sweep away stubborn dust without damaging your keyboard. This simple step helps make sure your keyboard stays clean and functioning smoothly.
Use Compressed Air
Using compressed air is one of the quickest ways to remove loose debris and dust from your keyboard. Hold the can upright to prevent propellant from spraying out and aim the nozzle at the gaps between keys. Use short bursts rather than continuous blasts to avoid damaging sensitive components. Keep the can at a safe distance—about 2 to 3 inches from the surface—to maximize effectiveness. Be thorough by targeting the underside of keys and hard-to-reach areas. Remember, don’t shake the can or tilt it sideways, as this can release liquid propellant.
- Focus on the spaces between keys
- Use a sweeping motion for even coverage
- Avoid excessive pressure to prevent dislodging keys
- Keep the can upright to avoid liquid spray
- Repeat regularly for ongoing cleanliness
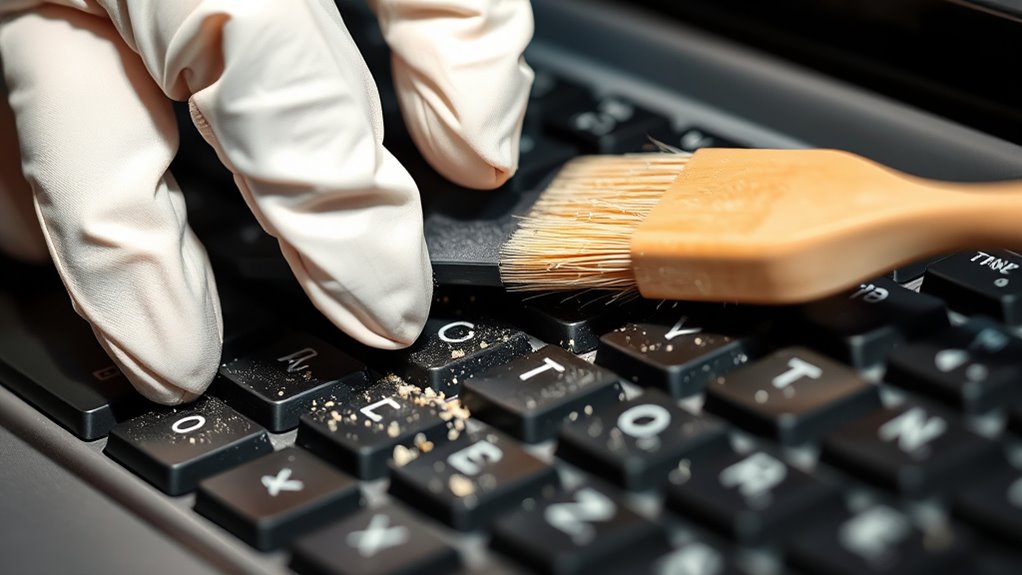
Gentle Brushing Techniques
After blowing out loose debris with compressed air, a gentle brushing can help remove remaining dust and particles from hard-to-reach areas. Use a soft-bristled brush, like a toothbrush or a small paintbrush, to carefully sweep between keys and around edges. Light, sweeping motions prevent pushing dust further into crevices or damaging sensitive components. Focus on areas where dust tends to settle, such as around stabilizers and beneath keycaps. Avoid applying too much pressure, as this can dislodge keycaps or damage delicate parts. Regular brushing keeps dust from accumulating and turning into sticky grime. For stubborn debris, dampen the brush slightly with isopropyl alcohol or water, but never use excessive moisture. Consistent, gentle brushing is key to maintaining a clean, dust-free keyboard.

MagicFiber Microfiber Cleaning Cloth, 6 Pack – Premium Cloth for Glasses, Lens, Screens & More
Glasses cleaner – Sourced from the highest quality microfiber that absorbs and removes dust, oil, smudges, fingerprints, dirt,…
As an affiliate, we earn on qualifying purchases.
As an affiliate, we earn on qualifying purchases.
Use Compressed Air for Hard-to-Reach Areas

Compressed air is one of the most effective tools for cleaning hard-to-reach areas inside your keyboard. It blasts out dust and debris lodged beneath and between keys, preventing buildup that can cause sticky keys or malfunctions. To use it properly, hold the can upright to avoid spraying propellant onto your keyboard. Aim the nozzle at different angles to dislodge debris from tight spots. Remember to keep a safe distance—about 2-3 inches—to prevent damage. Here are some tips to maximize its effectiveness:
Use short bursts of compressed air at 2-3 inches to safely dislodge dust from your keyboard.
- Use short bursts instead of continuous sprays
- Focus on one section at a time for thorough cleaning
- Tilt the keyboard to loosen debris falling out
- Cover other components to avoid accidental spraying
- Regularly replace or recharge your compressed air can
Wipe Down the Surface With a Damp Cloth
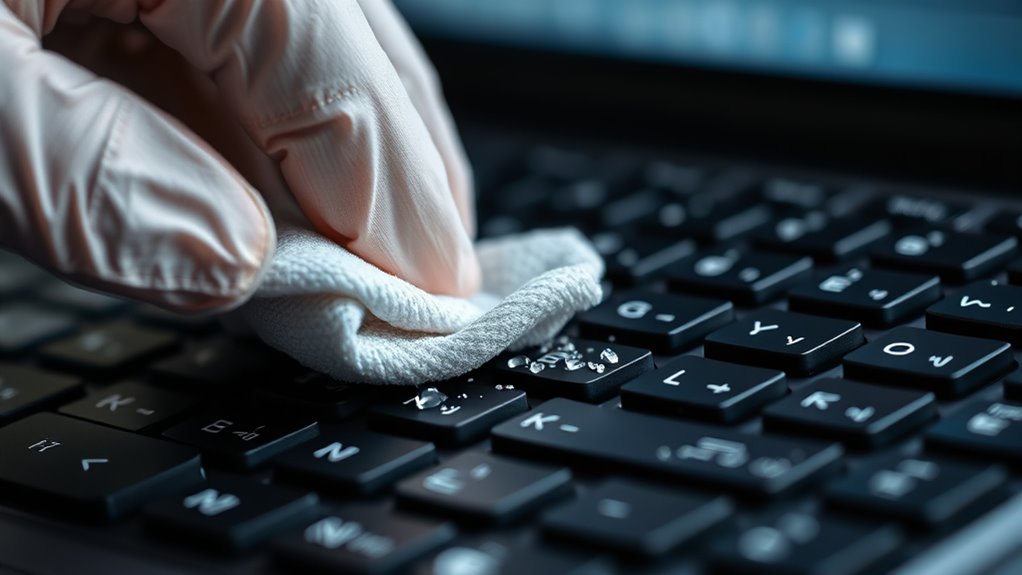
Once you’ve removed dust from the hard-to-reach areas, it’s time to clean the keyboard’s surface. Dampen a soft microfiber cloth with a small amount of water or a gentle cleaning solution. Wring out excess moisture so the cloth is just slightly damp, not soaking wet. Gently wipe the entire surface, including the keys and surrounding areas, to remove fingerprints, smudges, and dirt. Avoid using harsh chemicals or spraying directly onto the keyboard, as excess liquid can seep under the keys and cause damage. Focus on light, consistent pressure to lift grime without dislodging keys or pushing dirt further in. Regularly rinse and wring the cloth to keep it clean and effective. This simple step helps maintain a clean, hygienic keyboard and prevents sticky buildup.
Clean Between the Keys With a Soft Brush or Toothpick

Using a soft brush or a toothpick helps remove debris from between your keys without damaging them. Be gentle to avoid dislodging or scratching the keys, and use proper techniques for each tool. Taking care guarantees your keyboard stays clean and functional.
Gentle Brushing Techniques
To effectively clean between your keyboard keys, a gentle brushing method works best. Use a soft-bristled brush or a clean, disposable toothbrush to dislodge dust and debris without damaging sensitive components. Lightly glide the brush between the keys with a gentle, sweeping motion, avoiding applying too much pressure. This technique helps lift particles trapped in tight spaces while preventing damage to the keys or underlying mechanisms. For ideal results, consider the following tips:
- Use a brush with fine, soft bristles for precision.
- Work in a well-lit area to see trapped debris clearly.
- Keep the brush clean and dry to avoid spreading dirt.
- Brush in multiple directions to reach all sides of the keys.
- Regularly replace or clean your brush to maintain effectiveness.
Proper Toothpick Use
When cleaning between your keyboard keys, a toothpick can be an effective tool to remove stubborn debris that a brush might miss. Use a wooden or plastic toothpick to gently pry out crumbs, dust, or lint stuck in tight spaces. Carefully insert the tip into the gap, applying light pressure to lift debris without scratching or damaging the keys. Avoid excessive force, which can dislodge keycaps or cause internal damage. Move the toothpick along the sides and corners, working slowly to prevent pushing debris deeper. Combine this with a soft brush for broader cleaning. Keep the toothpick clean by wiping it frequently on a cloth or tissue to prevent redistributing dirt. Patience and gentle handling ensure you effectively remove debris without harming your keyboard.
Avoiding Key Damage
To prevent damaging your keyboard during cleaning, it’s best to use gentle methods like a soft brush or a toothpick for between-the-keys maintenance. These tools help dislodge debris without applying excessive pressure. When using a soft brush, opt for one with fine, gentle bristles to avoid scratching the keys. A toothpick works well for reaching into tight spaces but must be used carefully to prevent dislodging or damaging key components. Be sure to work slowly and avoid forcing debris out, which could harm underlying mechanisms.
- Use light, controlled movements to prevent dislodging keys
- Avoid metal tools that could scratch or bend components
- Keep the cleaning tools dry to prevent corrosion
- Never force debris out if resistance is felt
- Regularly inspect for loose or damaged keys afterward
Disinfect Your Keyboard Safely

Disinfecting your keyboard safely is essential to avoid damaging delicate components or causing electrical issues. Start by turning off your device and unplugging it to prevent any short circuits. Use a soft, lint-free cloth dampened with isopropyl alcohol (70% or higher), avoiding drips or excess liquid. Never spray disinfectant directly onto your keyboard; instead, apply it to the cloth. Gently wipe each key and surface, paying attention to crevices where germs hide. For stubborn spots, use a cotton swab dampened with alcohol. Make sure no liquid pools or seeps underneath the keys. Allow your keyboard to air dry completely before powering it back on. Following these steps guarantees effective disinfection without risking damage or electrical problems.
Regular Maintenance Tips to Keep Your Keyboard Clean

Maintaining a clean keyboard requires regular, proactive habits to prevent buildup of dirt and germs. Consistency is key to avoiding stubborn grime and sticky residues. To keep your keyboard in top shape, incorporate simple routines into your daily schedule.
Regular, proactive habits keep your keyboard clean and functioning at its best.
- *Wash your hands* before typing to minimize dirt transfer.
- *Use compressed air* weekly to remove debris from between keys.
- *Wipe down* your keyboard with a microfiber cloth and disinfectant spray bi-weekly.
- *Avoid eating* directly over your keyboard to prevent crumbs and spills.
- *Press and clean* frequently touched keys with disinfectant wipes.
These habits help maintain hygiene, prolong your keyboard’s lifespan, and ensure a cleaner workspace. With just a few minutes of regular effort, you’ll prevent dust buildup and sticky goo, keeping your keyboard fresh and functional.
Frequently Asked Questions
How Often Should I Clean My Keyboard for Optimal Hygiene?
You should clean your keyboard at least once a week to maintain ideal hygiene. If you eat or drink near your computer or notice dust and debris accumulating, consider cleaning more frequently. Regular cleaning prevents sticky buildup and germs from spreading. Use a soft cloth, compressed air, and gentle cleaning solutions to keep your keyboard in top shape. Staying consistent ensures your workspace stays clean and germ-free.
Can I Use Household Cleaning Products on My Keyboard?
You can use household cleaning products on your keyboard, but you need to be careful. Avoid harsh chemicals like bleach or ammonia, which can damage the plastic and electronics. Instead, opt for a damp microfiber cloth with a mild soap solution or alcohol-based wipes. This way, you clean effectively without risking sticky residue or damage. Remember to turn off your device and unplug it before cleaning for safety.
What Should I Do if Liquid Spills Inside the Keyboard?
If liquid spills inside your keyboard, unplug it immediately to prevent further damage. Turn the keyboard upside down to let the liquid drain out and gently shake it if needed. Carefully remove the keys if possible, then dry all components with a soft cloth. Leave the keyboard in a dry, ventilated area for at least 24 hours before attempting to reconnect or use it again.
Are There Any Keyboard Cleaning Methods to Avoid?
You should avoid using harsh chemicals, like bleach or strong solvents, on your keyboard because they can damage the plastic and internal components. Steer clear of excessive water or wet cloths that might seep inside and cause shorts. Additionally, don’t use abrasive tools or scrub vigorously, as this can scratch keys or dislodge parts. Instead, opt for gentle, approved cleaning methods to keep your keyboard in good shape.
How Can I Prevent Dust Buildup Between the Keys?
You might think brushing away dust is enough, but it’s not. To prevent dust buildup between your keys, regularly use compressed air to blow out debris, and wipe the surface with a slightly damp microfiber cloth. Avoid eating or drinking near your keyboard, and keep it in a dust-free environment. Consistent maintenance prevents dust from settling deeply, saving you from sticky, difficult-to-clean goo later on.
Conclusion
Keeping your keyboard clean is like tending a garden—you need to remove the weeds before they turn into stubborn, sticky messes. With simple steps, you’ll clear away dust and grime, allowing your keys to shine like new blossoms. Regular care prevents dirt from taking root and turning into gunk that’s tough to tame. So, make cleaning a quick ritual, and enjoy a smooth, fresh keyboard that’s ready to support your every keystroke.